

Table of contents
- Introduction:
- Diagram:
- Infrastructure Setup & Project steps :
- Step 1: Prepare the AWS Account
- Step 2: Create an IAM role for the EKS Cluster
- Step 3: Create a Dedicated VPC for the EKS Cluster
- Step 4: Create EKS Cluster
- Step 5: Install & Setup IAM Authenticator and Kubectl Utility
- Step 6: Create an IAM Role for EKS Worker Nodes
- Step 7: Create Worker nodes
- Step 8: Deploying Demo Application
- Conclusion:
Introduction:
Amazon Elastic Kubernetes Service (EKS) simplifies the process of deploying, managing, and scaling Kubernetes clusters in the cloud. In this guide, we'll walk through the step-by-step process of creating an AWS EKS cluster, from setting up IAM roles to deploying a demo application.
Diagram:
Infrastructure Setup & Project steps :
Step 1: Prepare the AWS Account
Before we dive into setting up the infrastructure, ensure you have the following prerequisites:
- An AWS account with appropriate permissions to create EC2 instances and IAM roles.
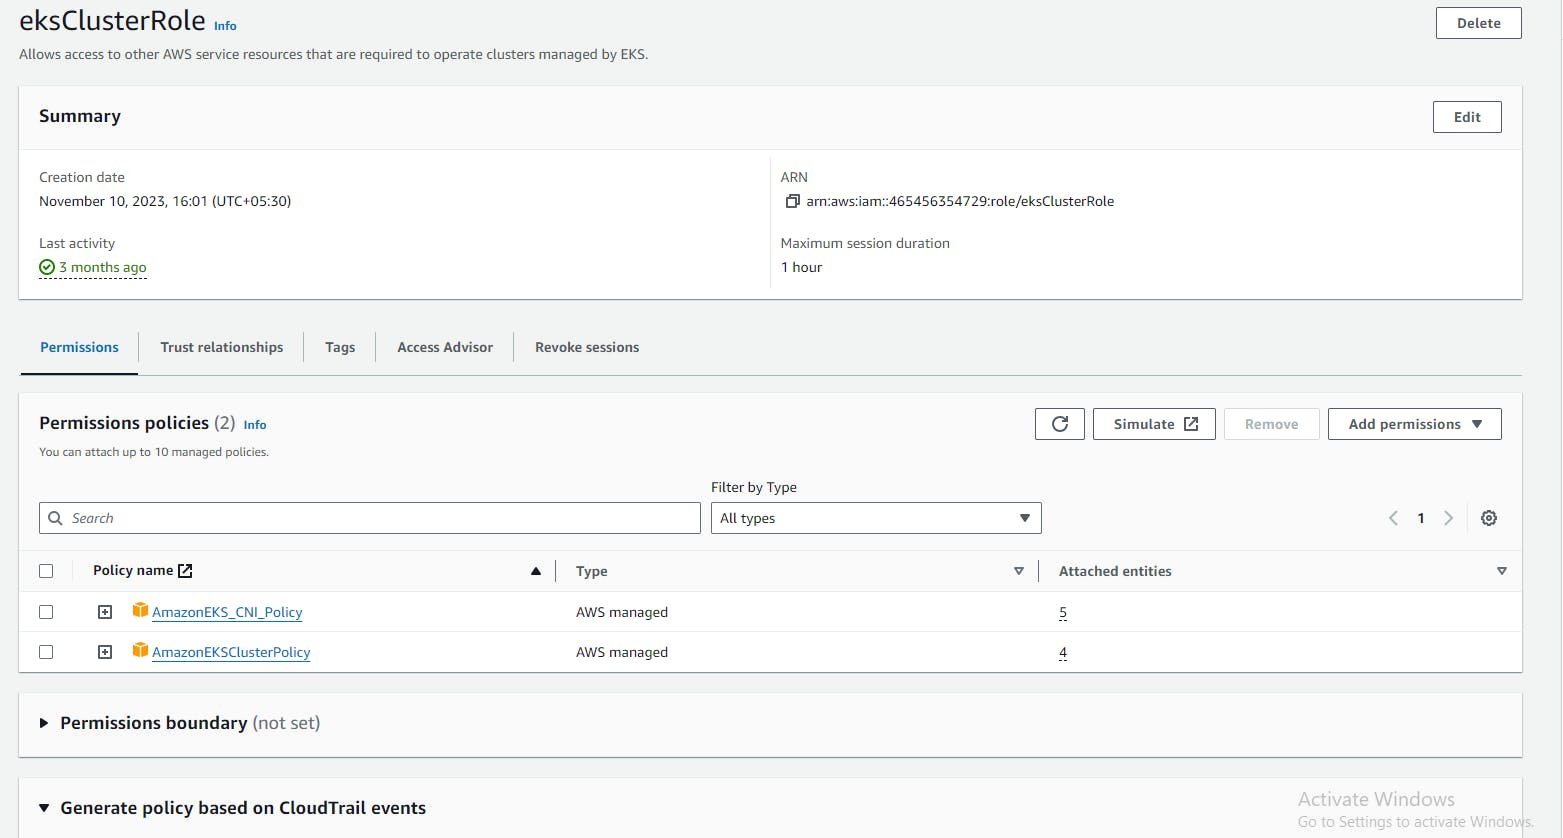
Step 2: Create an IAM role for the EKS Cluster
Before diving into the technical details, let's understand the role of IAM roles in EKS. IAM roles define who or what can perform actions within an EKS cluster. For EKS, we need roles for both the cluster itself (to manage resources) and for worker nodes (to join the cluster and perform tasks).
To create an IAM role for the EKS cluster, follow these steps:
Navigate to IAM Console: Sign in to the AWS Management Console and navigate to the IAM service.
Create Role: Click on "Roles" in the left-hand navigation pane and then "Create role."
Select Service: Choose "EKS" as the service that will use this role and click "Next: Permissions."
Attach Policies: Attach policies that grant necessary permissions for EKS cluster management. At a minimum, attach the "AmazonEKSClusterPolicy" and "AmazonEKSServicePolicy" managed policies.
Name and Review: Provide a name for the role (e.g., "EKS-Cluster-Role") and an optional description. Review the role configuration and click "Create role."
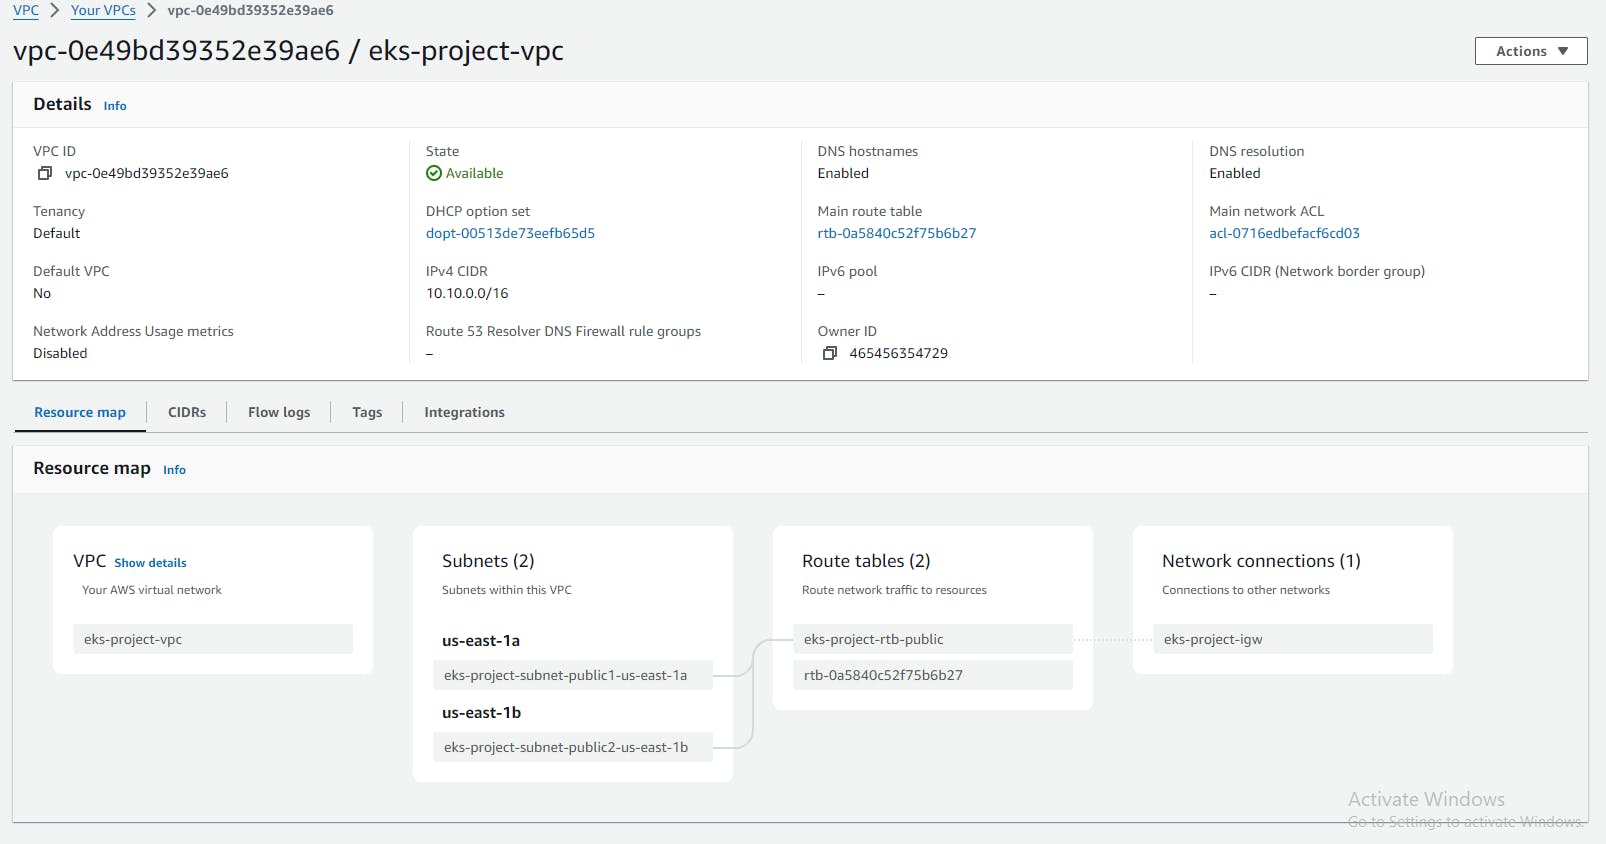
Step 3: Create a Dedicated VPC for the EKS Cluster
Before creating the VPC, it's essential to plan your network architecture carefully. Consider factors such as IP address ranges, subnets, routing, and security groups. Determine how your EKS cluster will interact with other AWS services and external networks.
Create a VPC: Navigate to the Amazon VPC console and click "Create VPC." Choose a suitable CIDR block (e.g., 10.0.0.0/16) and select an Availability Zone (AZ) or multiple AZs for redundancy.
Create Subnets: Within your VPC, establish at least two private subnets in different AZs, ensuring high availability. Each subnet requires a CIDR block within the VPC's overall range (e.g., 10.0.1.0/24 and 10.0.2.0/24).
Configure Internet Gateway (Optional): If your cluster requires internet access, create an internet gateway and attach it to your VPC. However, for enhanced security, consider using a NAT gateway for outbound internet traffic only.
Create Route Tables: Craft route tables for each subnet, routing internet traffic (if applicable) to the internet gateway and directing intra-VPC traffic to the appropriate VPC endpoint.
Create Security Groups: Establish dedicated security groups for your cluster nodes and pods, defining inbound and outbound traffic rules based on your specific needs.
Once the VPC is created, verify that all configurations are correct and test connectivity to ensure that your EKS cluster can communicate with other resources within the VPC and the internet (if required).

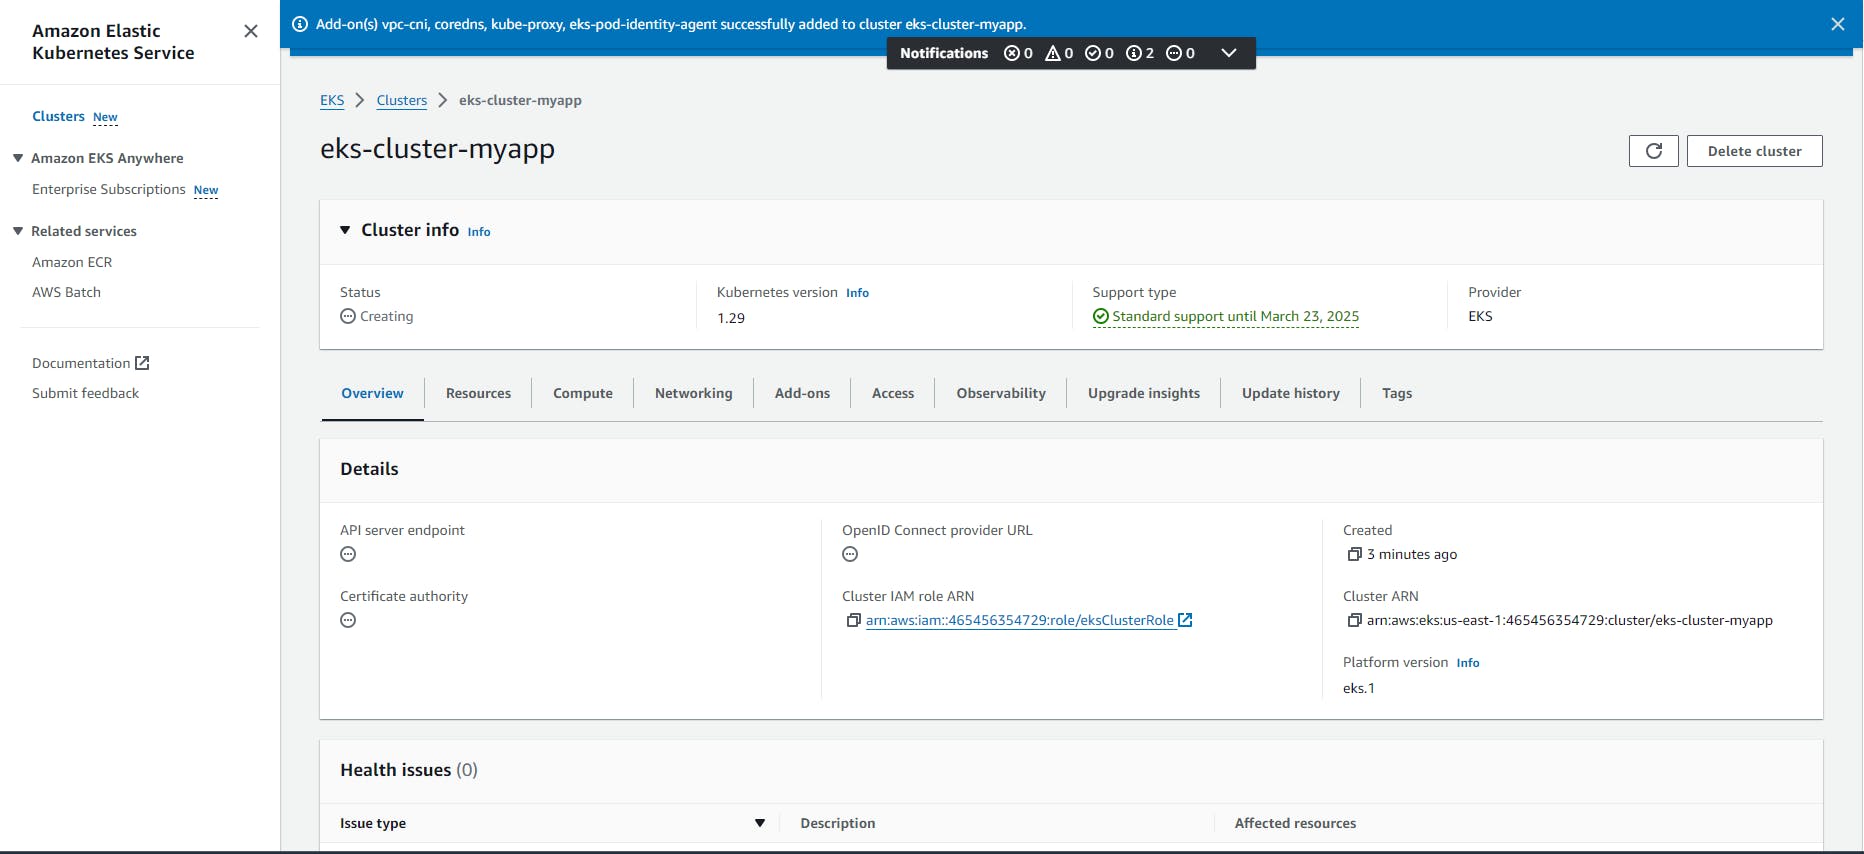
Step 4: Create EKS Cluster
creation of an EKS cluster, paving the way for deploying and managing your containerized applications with ease.
- Navigate to the EKS console: Log in to the AWS Management Console and navigate to the "Amazon EKS" service.
- Create cluster: Click on "Create cluster" and choose a suitable name.
- Configure Kubernetes version: Select the desired Kubernetes version (e.g., 1.24) based on your application requirements and compatibility considerations.
- Choose cluster nodes: Select the node instance type (e.g., t2.medium) considering factors like resource needs and cost optimization. Specify the desired number of nodes for initial scaling.
- Networking: Select the VPC where you want to deploy your cluster and choose the subnets for your cluster nodes. You can create a dedicated VPC for enhanced security (discussed in a separate blog post).
- IAM Role: Create a new IAM role or use an existing one with the necessary permissions for the EKS cluster to manage resources within your AWS account.
- Networking configuration: Configure advanced networking options if required, such as access to the internet gateway or configuration of a NAT gateway for outbound internet access.
- Cluster configuration: Review and adjust additional cluster configuration options like cluster logging, monitoring, and advanced security settings.
- Create cluster: Once satisfied with the configuration, click "Create cluster" to initiate the cluster creation process.
Once the cluster creation process is underway, monitor the progress in the EKS console. Once the cluster status changes to "ACTIVE," your EKS cluster is ready for use.
Step 5: Install & Setup IAM Authenticator and Kubectl Utility
IAM Authenticator for Kubernetes: This official Kubernetes project acts as a bridge between your IAM identity and the Kubernetes API server. It fetches temporary credentials from the AWS Security Token Service (STS) and uses them to authenticate your kubectl commands.
Download the Amazon EKS-vended aws-iam-authenticator binary from Amazon S3:
curl -o aws-iam-authenticator https://amazon-eks.s3.us-west-2.amazonaws.com/1.15.10/2020-02-22/bin/linux/amd64/aws-iam-authenticator
Apply execute permissions to the binary:
chmod +x ./aws-iam-authenticator
And move it into a common directory:
sudo mv ./aws-iam-authenticator /usr/local/bin
Test that the aws-iam-authenticator binary works:
aws-iam-authenticator help
kubectl: This command-line tool serves as your interface for interacting with Kubernetes clusters. It allows you to view, deploy, manage, and scale containerized applications running within your cluster.
Download the latest release with the command for kubectl:
curl -LO https://dl.k8s.io/release/$(curl -L -s https://dl.k8s.io/release/stable.txt)/bin/linux/amd64/kubectl
Validate the binary (optional)
curl -LO https://dl.k8s.io/release/$(curl -L -s https://dl.k8s.io/release/stable.txt)/bin/linux/amd64/kubectl.sha256
echo "$(cat kubectl.sha256)  kubectl" | sha256sum –check
If valid, the output is:
kubectl: OK
sudo install -o root -g root -m 0755 kubectl /usr/local/bin/kubectl
Test to ensure the version you installed is up-to-date:
kubectl version --client
Step 6: Create an IAM Role for EKS Worker Nodes
Before creating the IAM role, it's essential to determine the permissions required by the worker nodes. At a minimum, worker nodes typically require permissions to:
· Communicate with the EKS control plane.
· Access resources within the EKS cluster (e.g., pods, services).
· Pull container images from Amazon Elastic Container Registry (ECR) or other container repositories.
· Interact with other AWS services as needed by your workloads.
Follow these steps to create an IAM role for EKS worker nodes:
Navigate to IAM Console: Sign in to the AWS Management Console and navigate to the IAM service.
Create Role: Click on "Roles" in the left-hand navigation pane and then "Create role."
Select Service: Choose "EC2" as the service that will use this role and click "Next: Permissions."
Attach Policies: Attach policies that grant the necessary permissions for EKS worker nodes. At a minimum, attach the "AmazonEKSWorkerNodePolicy" and "AmazonEC2ContainerRegistryReadOnly" managed policies.
Name and Review: Provide a name for the role (e.g., "EKS-Worker-Role") and an optional description. Review the role configuration and click "Create role."

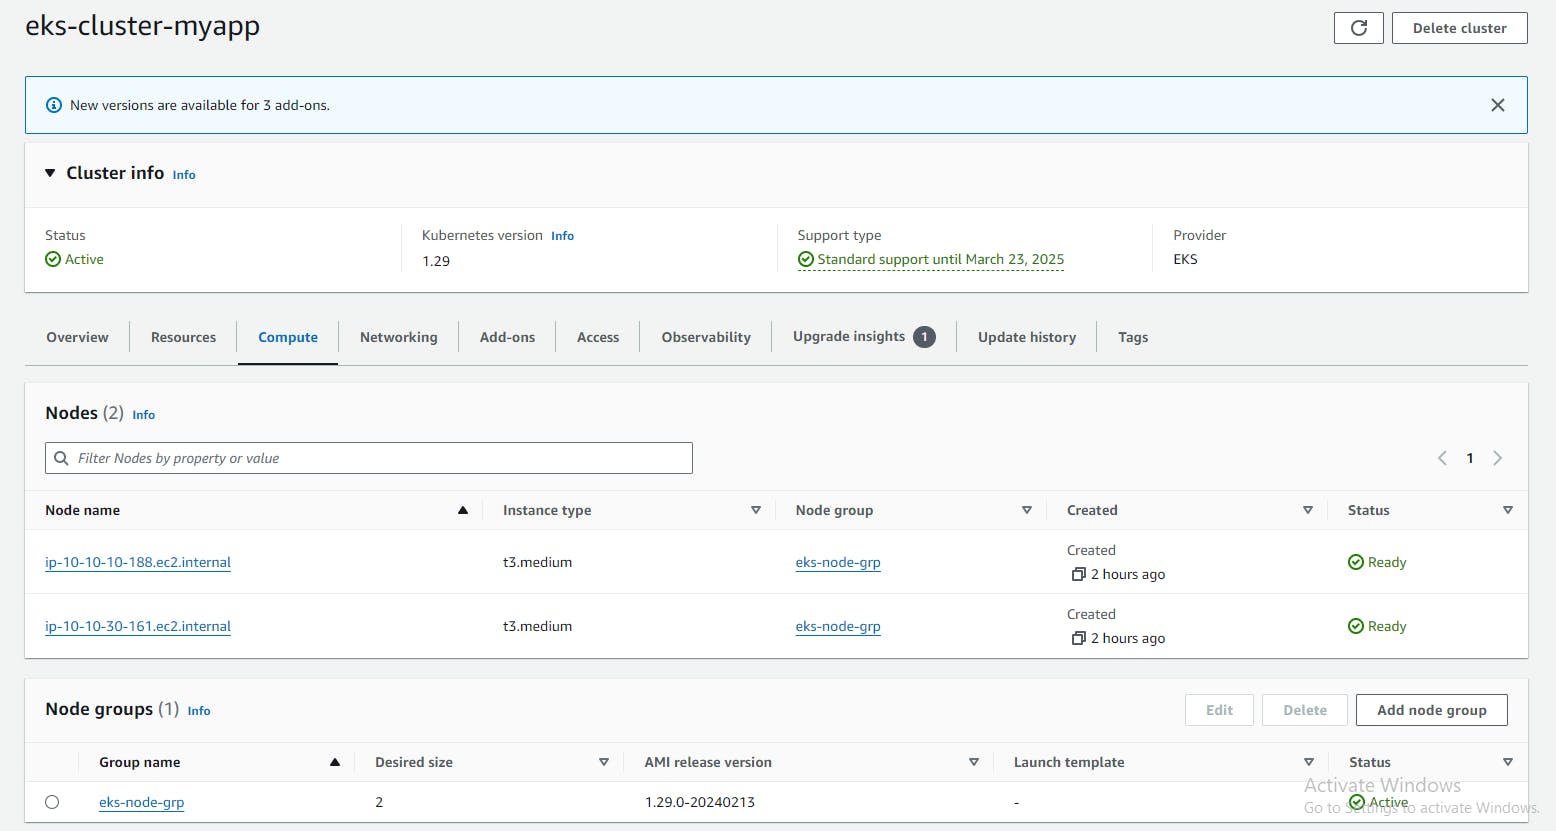
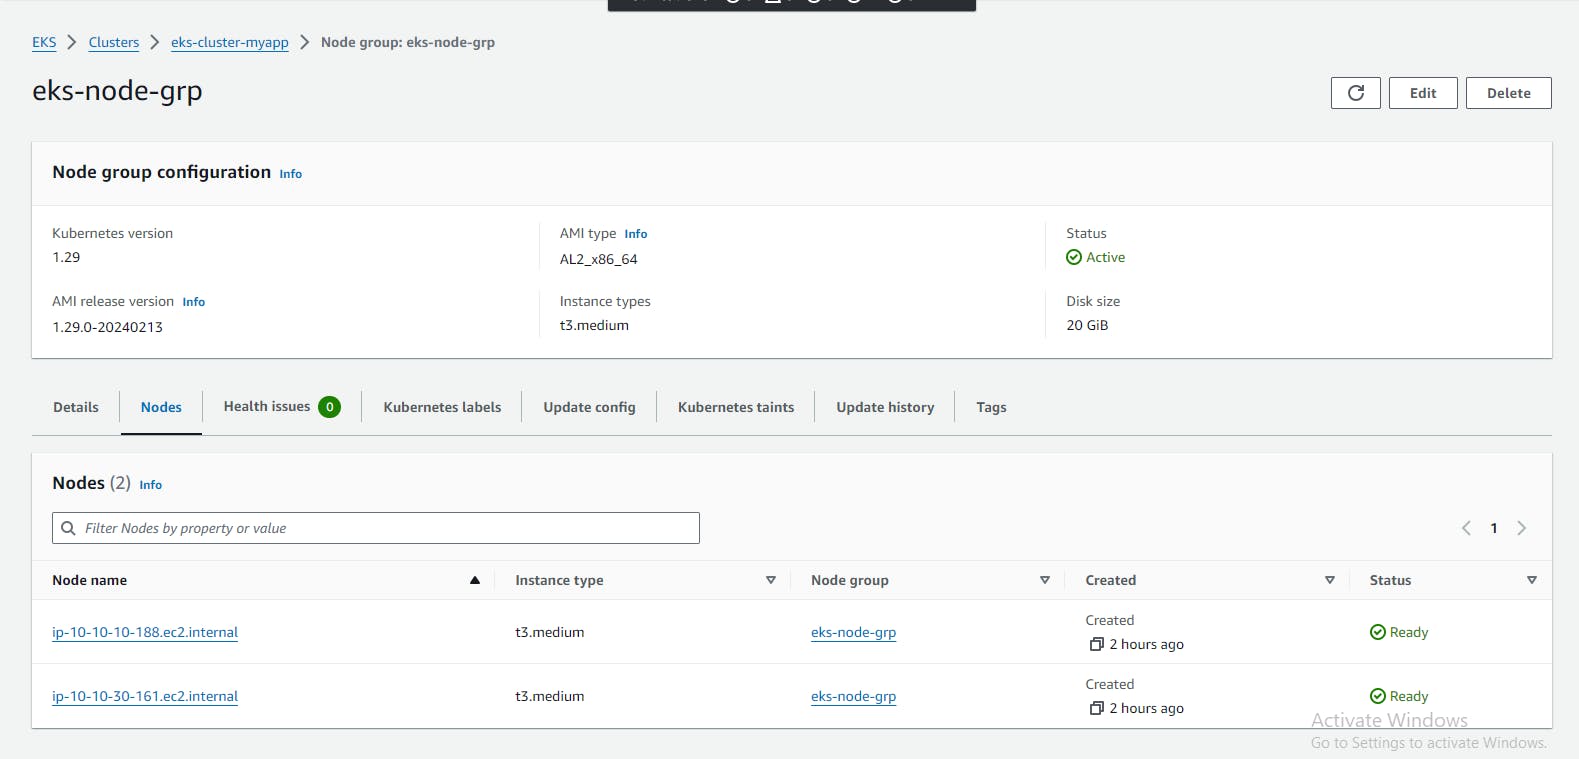
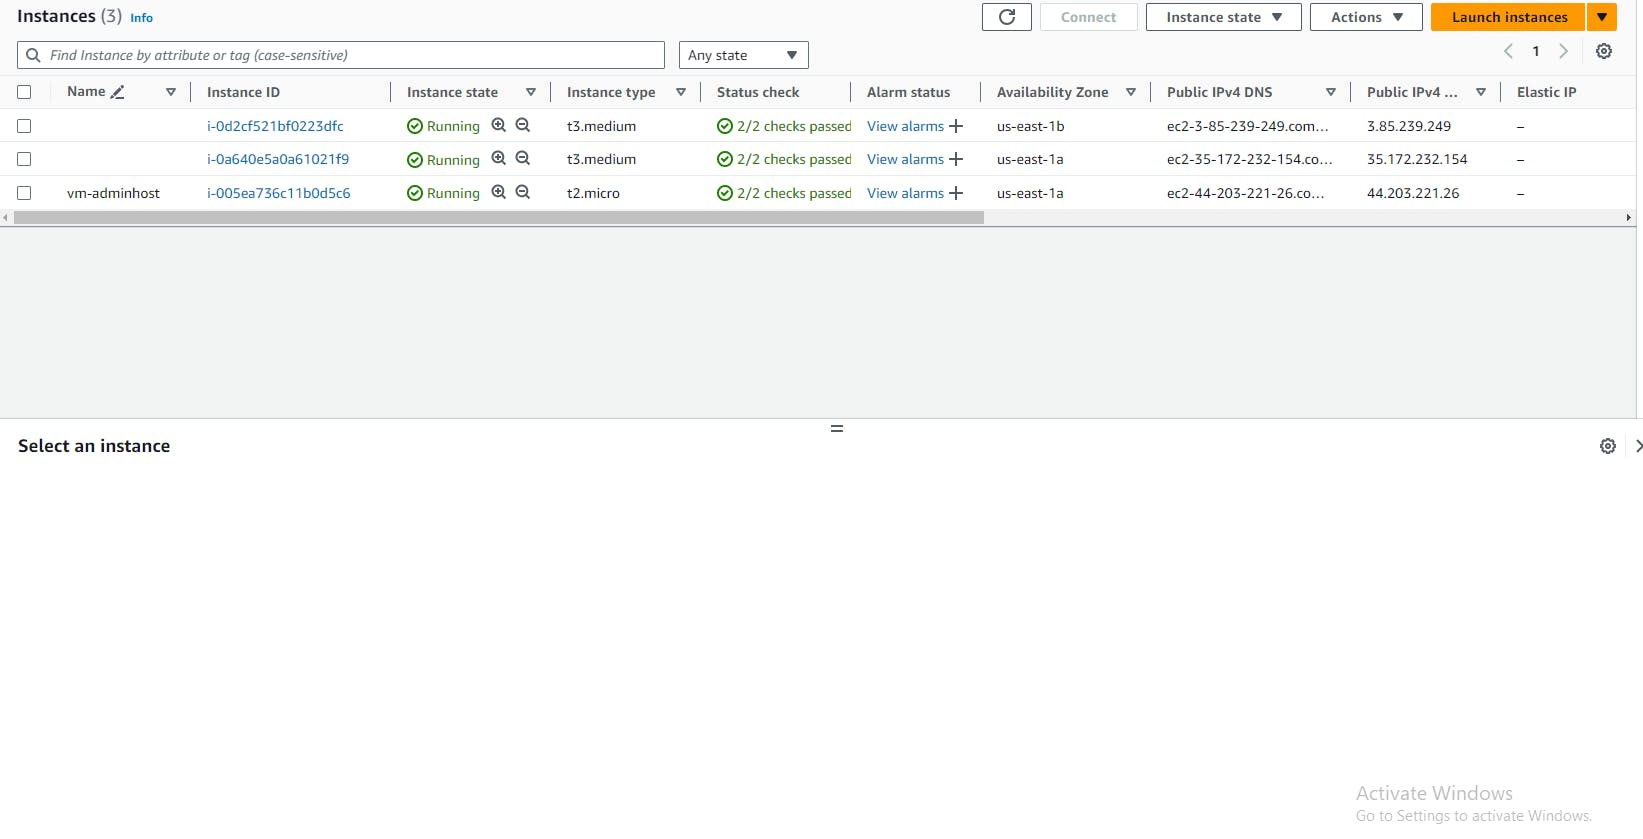
Step 7: Create Worker nodes
Worker nodes are EC2 instances that join your EKS cluster and execute tasks such as running pods, serving application traffic, and processing workloads. These nodes play a crucial role in the scalability, reliability, and performance of your Kubernetes environment.
Choose a Deployment Method: Decide whether you want to deploy worker nodes manually or using a tool like eksctl, AWS CloudFormation, or the Amazon EKS Managed Node Groups.
Configure Worker Node Instance Type: Select the EC2 instance type for your worker nodes based on your application requirements and performance considerations. Consider factors such as CPU, memory, and networking capacity.
Specify AMI and Launch Configuration: Choose the Amazon Machine Image (AMI) for your worker nodes, typically based on the Amazon EKS-optimized AMI provided by AWS. Configure the launch configuration with details such as IAM role, key pair, security groups, and user data (if needed).
Define Node Group Settings: Configure additional settings for your worker node group, such as the desired number of nodes, instance types, subnet placement, and scaling options. You can also specify labels and taints to control pod scheduling.
Launch Worker Nodes: Review the configuration settings and launch the worker nodes. Monitor the provisioning process in the AWS Management Console or command-line interface.
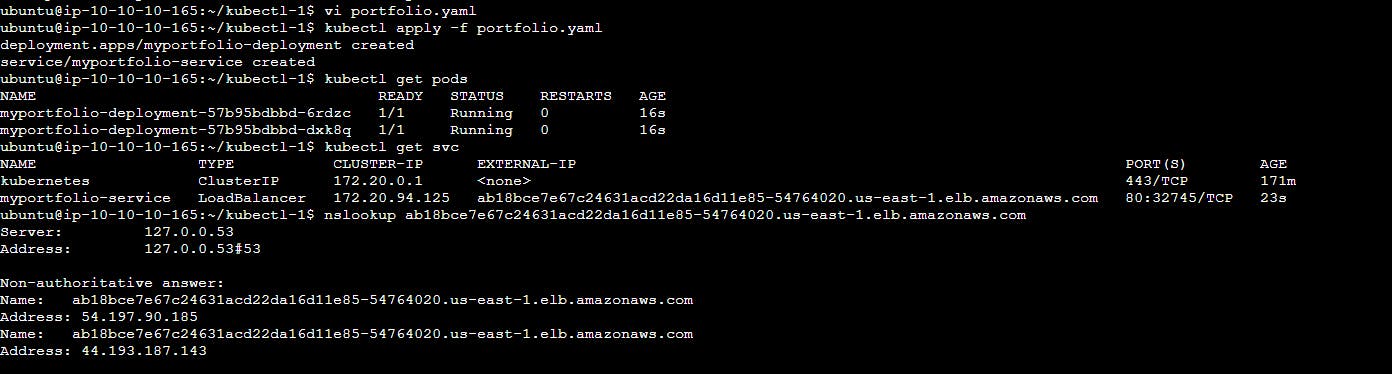
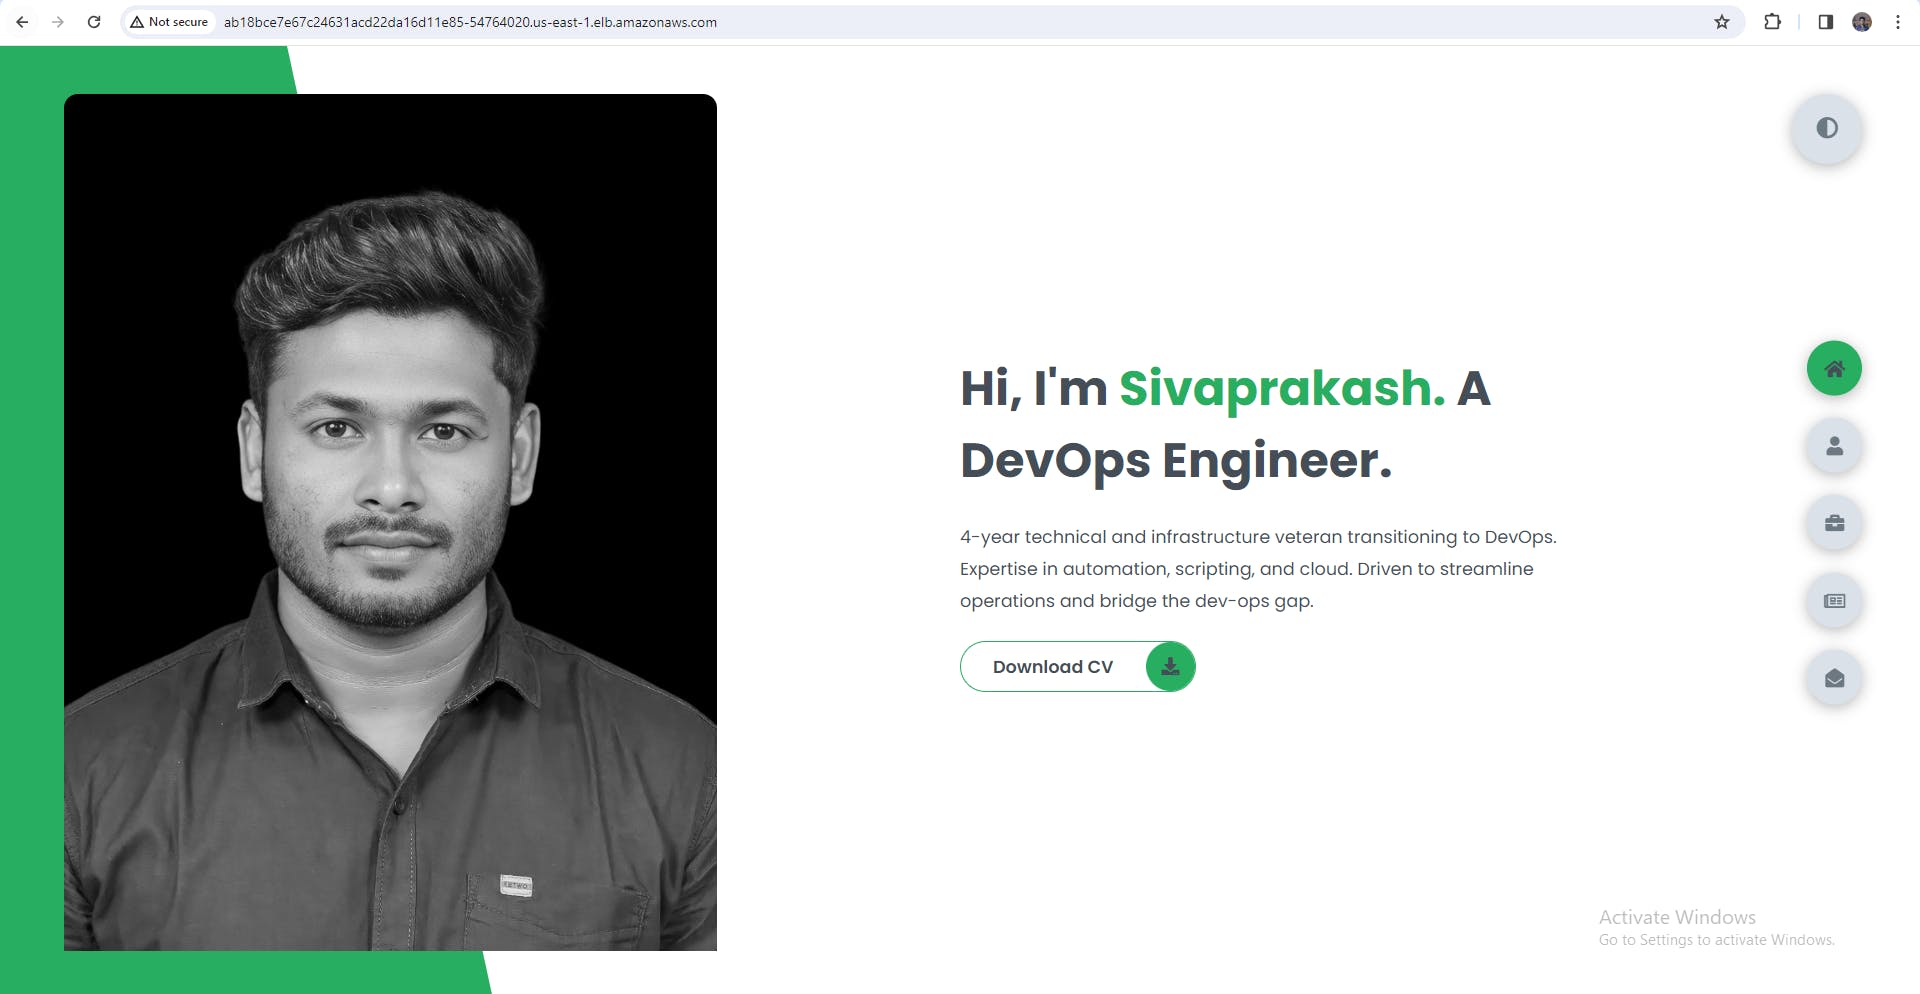
Step 8: Deploying Demo Application
To interact with your EKS cluster using kubectl, you need to configure the Kubernetes client:
Update kubeconfig: Run the following command to update your kubeconfig file with the credentials and endpoint information for your EKS cluster:
aws eks --region <region> update-kubeconfig --name <cluster-name>
To deploy the NGINX application on Amazon EKS, you need to create Kubernetes manifests that define the desired state of your application. The manifests typically include:ginx-deployment.yaml
nginx-deployment.yaml
apiVersion: apps/v1
kind: Deployment
metadata:
  name: myportfolio-deployment
spec:
  replicas: 2
  selector:
    matchLabels:
      app: myportfolio
  template:
    metadata:
      labels:
        app: myportfolio
    spec:
      containers:
        - name: nginx-container
          image: sivaprakash1998/myportfolio:v3
          ports:
            - containerPort: 80
---
apiVersion: v1
kind: Service
metadata:
  name: myportfolio-service
spec:
  type: LoadBalancer
  selector:
    app: myportfolio
  ports:
    - protocol: TCP
      port: 80
      targetPort: 80
kubectl commands to run the deployment manifests .yaml file
kubectl apply -f nginx-deployment.yaml
kubectl commands to get services,
kubectl get deployments
kubectl get pods
kubectl get services
Conclusion:
Congratulations! You've successfully created an AWS EKS cluster from scratch, configured IAM roles, launched worker nodes, and deployed a demo application. With EKS, managing Kubernetes clusters in the cloud has never been easier, empowering you to focus on building and scaling your applications. Happy clustering!
Let's learn together! I appreciate any comments or suggestions you may have to improve my learning and blog content.
Thank you,
Sivaprakash S
#Dockerimage #DockerHub #Portfoliowebsite #EKS #ContinuousDeployment #Automation #kubernetes #Containerization #DeploymentPipeline #CodeScanning #Portfolio #AWS #GitHub #ApplicationDeployment #DeploymentAutomation #SoftwareDelivery #DevOpsJourney #AgileDevelopment #jenkins #nginx #bash #shell #IAM #VPC #AWSDevOps